How to make a fence of corrugated hands - a step by step description of the workflow
Table of contents
-
1 How to organize the work
- 1.1 preliminaries
- 1.2 Materials and tools
- 1.3 Installation and mounting pillars prozhiliny
- 1.4 Fixing corrugated
- 2 Output
If you decide to put up a fence of corrugated board with their own hands, this review is for you. It is very detailed and clear description of all the nuances of the workflow. You just need to repeat all the steps - and the result will be no worse than the professional builders.
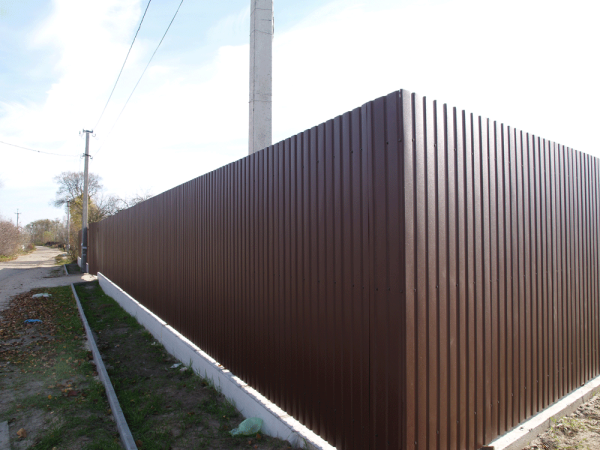
In the photo: a fence is very reliable and durable
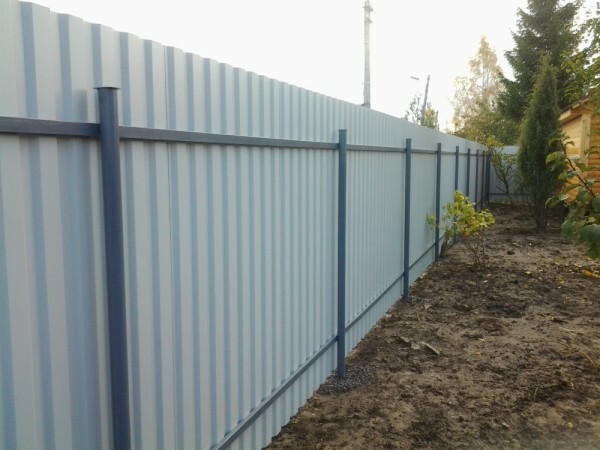
A fence made of profiled sheet and the inner side looks neat
How to organize the work
To get a good result, not enough to understand only in the features of the installation of the fence of corrugated board. It is necessary to choose high-quality materials, use the right tool and build a strong support structure. We will analyze the process from the beginning to the end, that you do not have any questions left.
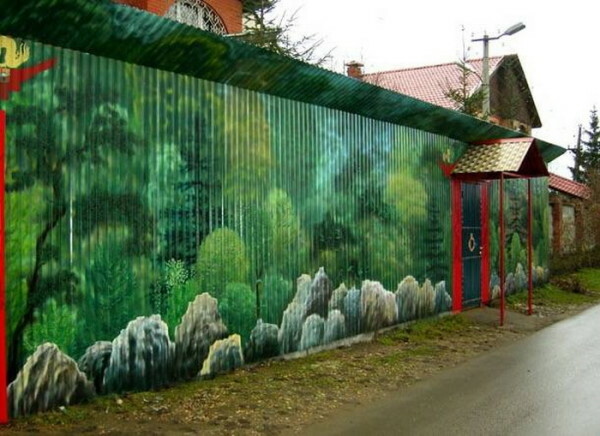
If desired, you can turn the fence into a real picture
preliminaries
Immediately go buy the materials - not the best solution. Since you do not know the exact number, but even a professional will not perform calculations on the eye.
So do not be lazy and spend half an hour to carry out measurements and calculations:
- The first determines the location of fence. The line stretched the cord construction, which will serve as the main reference. At the corners hammered wooden pegs or metal elements, and which is attached cord or monofilament;
It is important that the column was not firmly bent when pulling
- Made length measurements. First of all it is necessary to specify the length of the fence. It's simple, you need to work to bring an assistant and using a tape measure to conduct all measurements;

Measurement - a mandatory part of training
- It is determined by the location step bars. It can be anything, but the range is usually selected from 2 to 3 meters, 2.5 meters - the most popular and user-friendly solution. It is best to mark the position of props, so you can accurately calculate the required number of columns;
- Calculate the required volume of trapezoidal sheet. It's simple, if you know the dimensions of the sheets of corrugated board. The standard width is 1155 mm, useful as equals 1100 mm. The height can be anyone you narezhut material to the nearest centimeter.
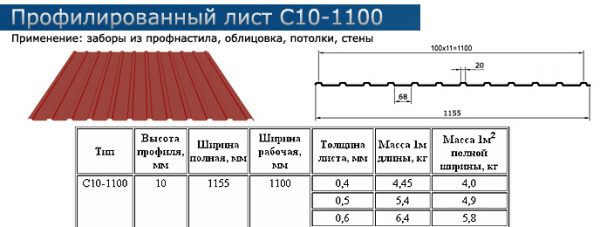
Here are all the necessary material parameters
If you have an uneven terrain, the fence should be designed so as to compensate for all the level changes. In this case, it is sure to do a strip foundation, by means of which close all the irregularities. Below is an example design for the uneven portion.
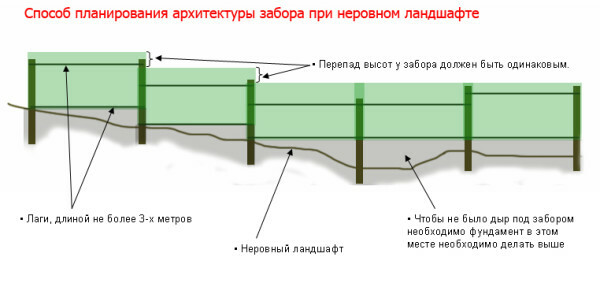
That's done with the fence uneven terrain
Materials and tools
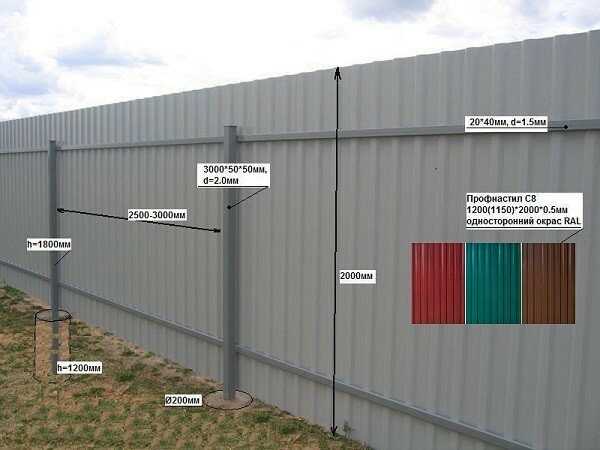
This diagram illustrates what materials and wherein the apparatus used in fencing
Even perfect compliance Mount Technology does not guarantee the reliability of the fence, if you used substandard materials. So you need to very carefully choose everything you need. The table below will allow you to make the right decision.
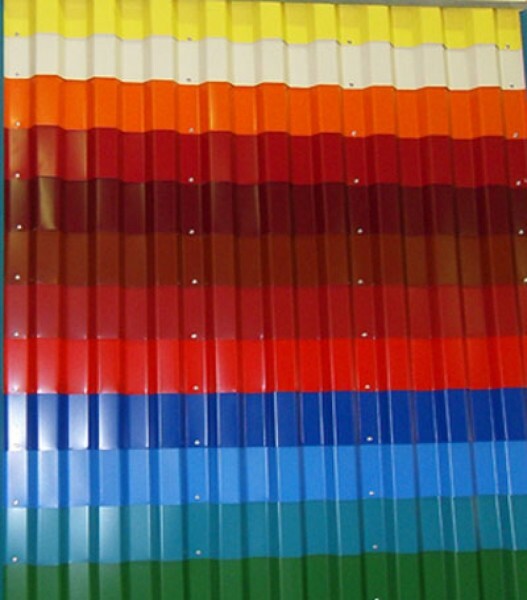
Wide range of colors will help you find the optimal solution for any site
| Material | Recommendations for choosing a |
| Decking | It is best to use variations with a wave height of 8-10 mm, they were labeled as C8 and C10, respectively. The material thickness must be 0.5 mm or more, thinner sheets recommend not to take. When buying look at the quality of staining: the surface must be perfect, without marriage and scratches |
| Stubs | Commonly used profiled pipe 50x50 mm or more. The length of the poles depends on the height of the fence, if this indicator is equal to 2 meters, the column must be 3 meters to secure the diaphragm. Easier to buy ready-made pillars, its price is higher, but you get the finished version, which does not need to be painted and cut |
| jumpers | They are best done from light and durable pipe 40h20 mm. For convenience of profiled sheet fastening select articles with a wall thickness of 1.5 mm. At this thickness, you can screw the screws without drilling holes, which speeds up and simplifies the workflow |
| fasteners | Decking is best secured using roofing screws. They are colored in a color base coat and has Sverlova tip for screwing into the metal without preliminary drilling. Also, in the article there is a washer with rubber base that covers the hole and protects it from moisture |
| Materials for concrete | To fasten the pillars need of cement concrete or sand and gravel, or cement-sand mortar, and a filler of stone, brick and broken concrete. The second option is easier and cheaper, as the stones and old bricks can be found at virtually no cost |
| Paint | Needed for coloring pillars and bridges. Use a primer and paint or composition that combines these components |
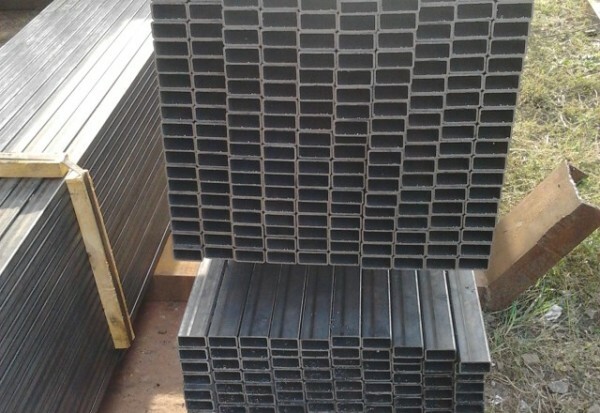
40h20 pipe - ideal for jumpers
Installation of a fence of corrugated board with your hands suggests that you have a certain set of tools:
- Welding machine for attaching prozhiliny to the posts. Suitable mobile version of the home, powered by 220 volts. If you do not know how to cook, it is easier to attract a welder for an hour or two. In this case, carry out the preparation and markup you need to advance, not to lose time and to work quickly;
- Bulgarian metal cutting and stripping before welding. This tool allows you to quickly and accurately cut the pipe, cleaned welds and prepare the surface for welding. Do not forget to stock up on the corresponding cutting and grinding diameter discs;
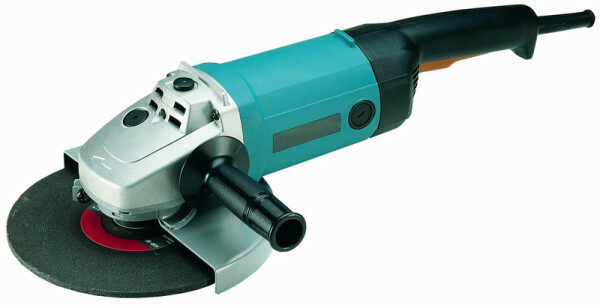
This tool is indispensable for carrying out various works with metal
- Cutting of corrugated board using tin snips. In no case do not spend working grinder from overheating of the steel sheet and a year later the ends begin to rust;
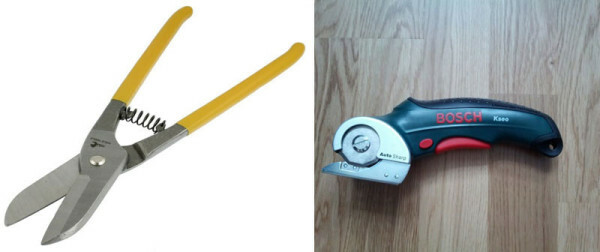
Hand shears are perfect for cutting the sheeting with a low wave
- For digging wells under pillars used shovel or special auger diameter of at least 20 cm;
- A solution prepared or manually (in this case, you will need a large capacity), or through mixers. The second option is preferable for large volumes of work. Need to buy equipment, you can rent it for 1 day;
- Measurements are made using a roulette layout is best done marker. Control the position of the pillars and the trapezoidal sheet is most convenient building level;
- Fastening sheets produced using a power screwdriver with a special nozzle M8. It is sold in DIY stores and are designed specifically for roofing screws, magnetic holder allows not to lose fasteners during use.
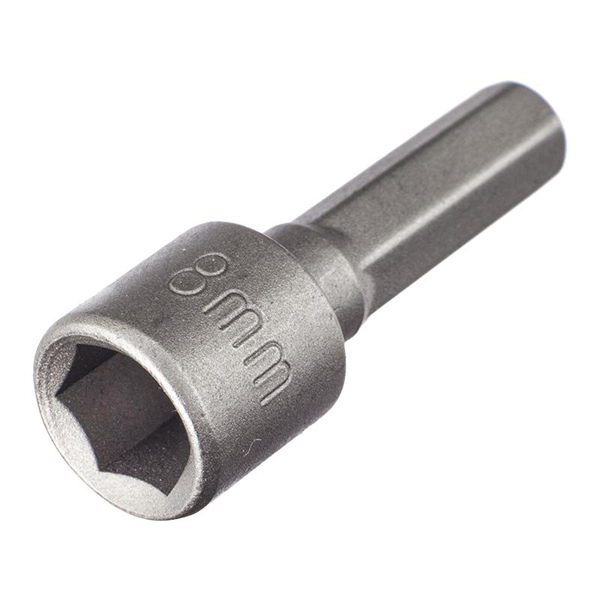
Special nozzle have to be on hand when using roofing screws
Installation and mounting pillars prozhiliny
Installing a fence of corrugated board starts with the mounting pillars.
The process consists of the following:
- Dig or drilled holes for pillars. Work is performed shovel or lignite, minimal penetration of supports should be at least 1 meter. In addition, the bottom is filled cushion of sand or gravel layer of 10-20 cm, this nuance, too, do not forget. Total depth is usually equal to 120-140 cm;
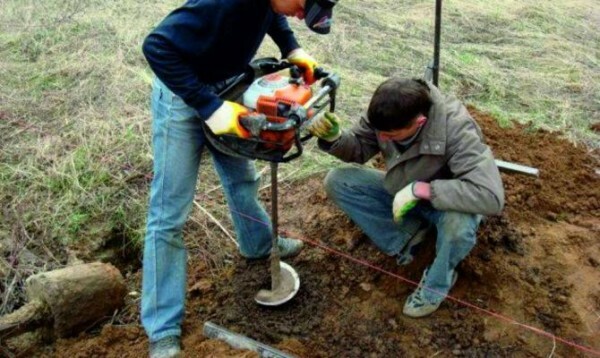
When drilling or digging wells do not forget to focus on the tense cord
- At the bottom is filled pillow. It will ensure the stability of the installation and will post prosest during concreting;
- Post set in place. First, it checks the height of its aboveground parts, the position is adjusted, if necessary. If the support is low, pour the sand, if high, the column gently deepens;
To be safe, can be welded to the underground part of the ledges and bridges. Then, during the concreting of column locks are much stronger.
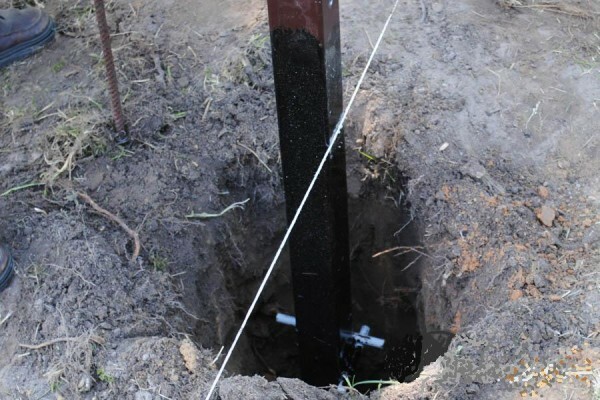
The bar is set on the rope
- If you are using a filler made of stones and bricks, the pit is filled to 2/3 of the depth. The rest of the need to put after the initial filling of the solution when it is to fill all the voids. Stones gently tamping, the column position is constantly checked by means of level, it must be level;
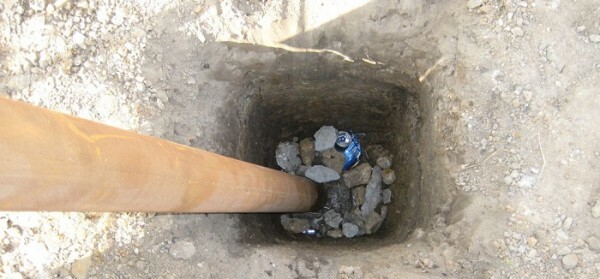
Immediately fill the pit with stones do not need to top
- preparing a solution of. If you do not have a filler, then mix cement, sand and gravel in the ratio of 1: 3: 5, the consistency of this should be fairly thick. If you are using stones or bricks, then preparing the semi-liquid solution of 1 part cement and 3 parts sand. The solution should penetrate all the cavities and fill them to the best of fastening;
- Produced concreting pillars. The solution was poured into the pit and compacted stick or reinforcement to it as best you can fill a hole, and it is left voids. The solution with gravel filled to the top, and if you have used the stones, then they must be the first stage closed, after which the filler is added to the top and filled with a solution to a desired level;
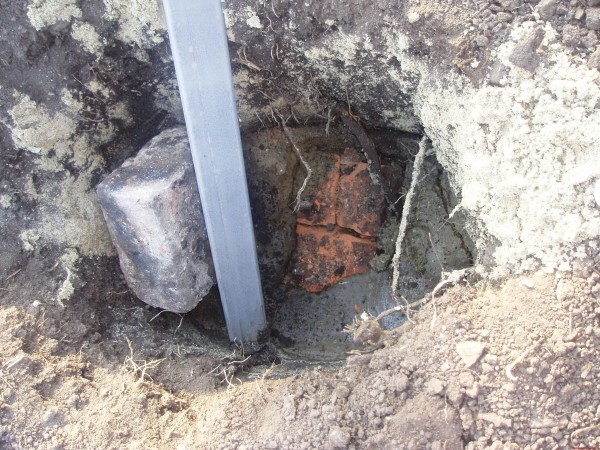
The filler is reported to the top and filled with a solution to the end
- Check the position of the elements. I know from his experience that even with accurate filling column may shift. So be sure to check out immediately after concreting its position level on all sides and make the alignment if necessary. Only after this work can be considered successfully completed.
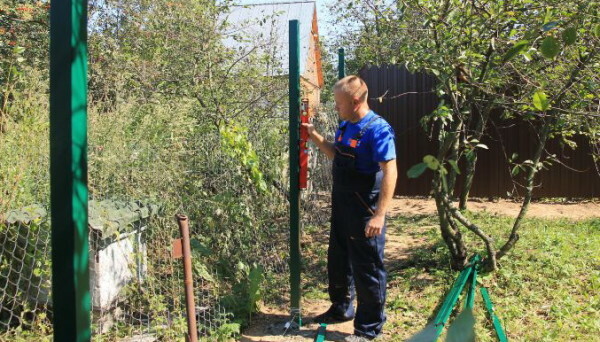
Always check the level at the end of each leg of concreting
To concrete gained strength, he needs time. It is best to continue to work no earlier than 5 days after concreting, during which time the material tightly adhered and solidified.
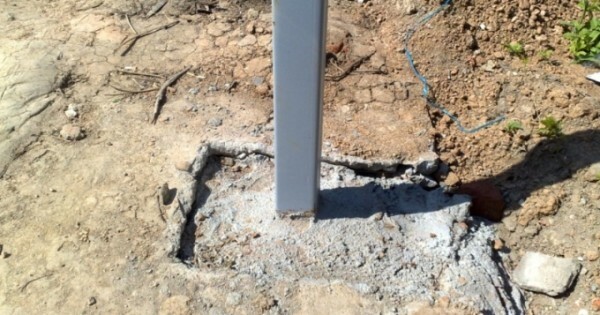
The solution should have a good grasp, and this takes time
fence installation of corrugated board with his hands technology includes a step like fastening prozhiliny. This part of the work can be done in two ways: by welding and the use of special brackets.
Let us consider each of them and start with welding:
- Preparing jumpers and pillars. Regarding prozhiliny, they are cut into pieces to be 5 mm less than the distance between the pillars. The surface of the pillars in place of the jumper mount trimmed if they are painted, the paint is removed;
- Prozhiliny exposed and welded. If you have a clamp, the easiest way to fix the bridge with their help, if no fixtures, the two assistants must adhere to the element until it is grab. Welding is performed around the perimeter of the junction;
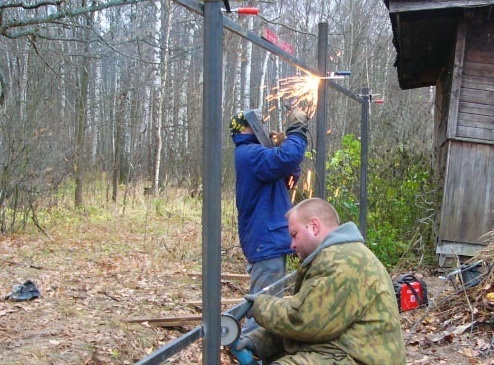
Using clamps very convenient to fix the structure before welding
- After welding the seams are stripped. Removed too protruding nodules and other flaws. Upon detection of badly-cooked portions they need podvarit again;
- The surface is cleaned and painted. If you have painted the pillars, only the painted areas and connections prozhiliny. If the coating is not present, the processing is performed in its entirety. Application of the protective structure made of at least two layers, special attention is paid to places of welding and other compounds.

The paint protects the metal against corrosion and improves the attractiveness of the design
Now analyze compounds embodiment pillars and lag by means of special brackets. How do they look, you can see in the photo, and how to use them, we will discuss below:
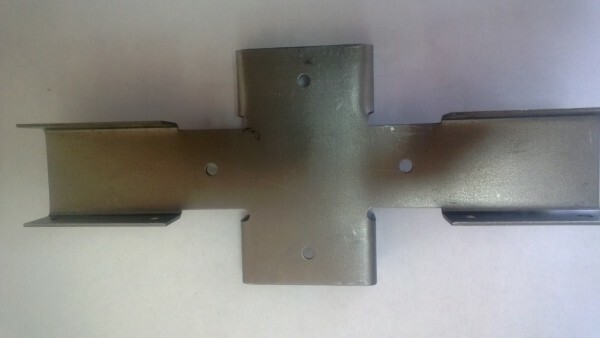
Fasteners made under a certain amount of posts and crosspieces, it is important to choose the suitable option
- The first element is set to the desired level. Mounting to a pole is performed using self-tapping screws. Fixing can be done on the sides or from the front side, all depends on the design of the fastener assembly;
- Put an arm on the second pillar. To accurately determine its position, it is necessary to put the jumper and put it not building level. According to it, to determine the exact mounting location, and it is screwed to the support. In the same manner operation continues throughout the length of the fence;
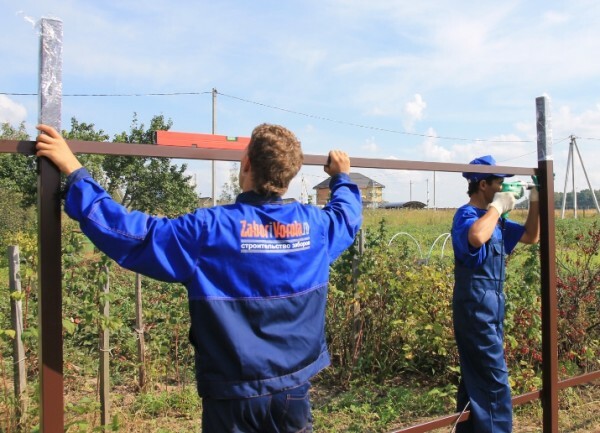
This option is suitable for those who do not want to use welding
- Jumpers are fixed with screws from the back side. It turns out very durable and perfectly smooth node. The only disadvantage of this solution is that the fasteners can be found in all cities, so if you decide to use this technique, make sure that you can buy arms.
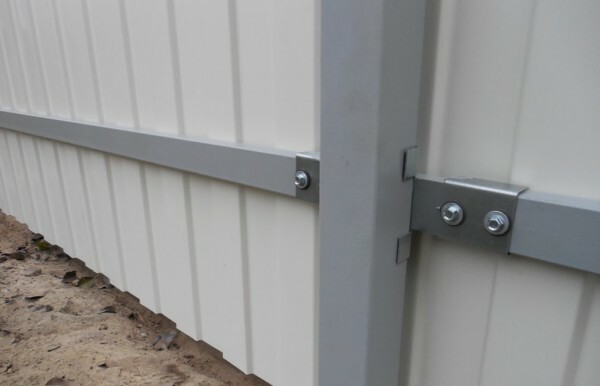
Construction of the fence by using arms greatly simplified
Fixing corrugated
Installation for corrugated fence is performed by the following scheme:
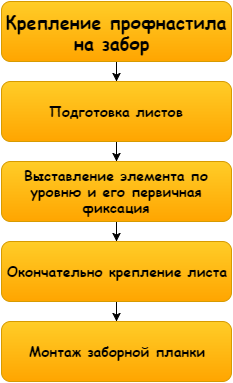
Installation of profiled sheet on the fence is no different complexity
- The first sheet is prepared. If you need a cut, then mark up and cut element. If the surface has a protective film, it is better to remove before attaching since then tear it out of the screws will be very difficult, and pieces of polyethylene, sticking out from under the washer, spoil the whole look fence;
Also, you should know how to fix the elements of self-tapping screws. Here it is necessary to focus on the rubber-based goals, it should not be crushed, but should not merely touch the surface. The correct version is shown in a simple and understandable picture below.
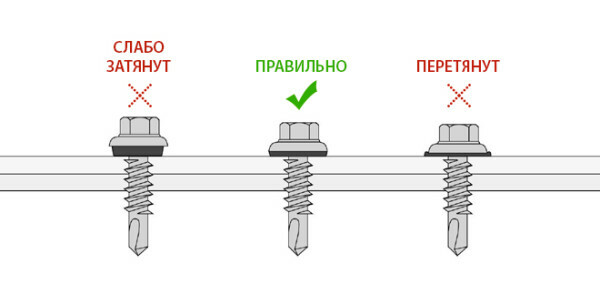
That's should be placed fasteners
- The sheet is set in the desired position and grab. To get started, simply tighten the 4 screws at the corners, so as not to have to keep the item. Further proflist mounted as intended, hardware should be placed through one wave length of typically 20-25 mm;
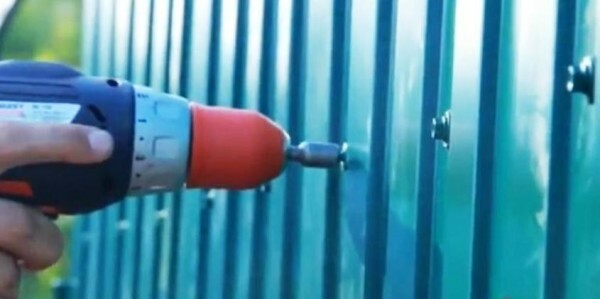
Screws are arranged through one wave and twisted with a special screwdriver nozzle
- The following sheets are fastened in a similar manner. Do not forget to check the position of each element level, many people forget about it after the installation of the first sheet, and ultimately by the end fence is formed appreciable skewing;
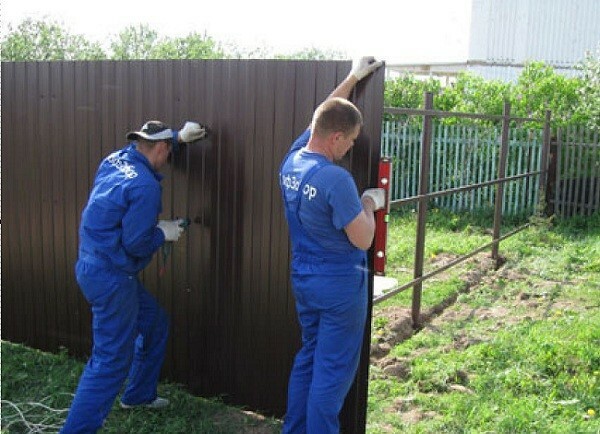
Securing Manual is simple, the main thing - check the position of each sheet
- Fastened fence pickets. It is necessary to make the design more attractive and close the upper ends of the precipitation. Elements simply worn on the upper part, is lapping at least 30 mm in places of their compounds. The connection is performed by means of rivets, which are selected in the color of the fence, it's simple and fast.
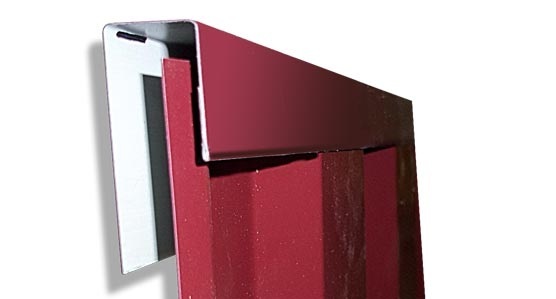
Sensing strip is worn on the upper part and fixed with rivets
Install a fence of corrugated board on the survey will not be difficult. If you are interested in the question of assembly and wicket gates, the process is similar to that described above with the only difference being that you need to cook frames and fasten them to the posts in the loop. Details on this type of work is described in a separate review on our website.
Output
After reading the review can cope with the work of any man, even more so that you can choose options for the design of assembly. Videos in this article will help you understand the subject better and clearly show many important aspects of installation. If you still have questions, please write them in the comments below.


