For industrial and agricultural activities, storage of products, placement of sports facilities and shopping malls, pre-fabricated hangar rooms of various types are used. One of them is the arched hangar. This article will help you to understand in more detail the characteristics of the structure, the pros and cons of use, as well as in the independent installation of the finished hangar.
What is an arched hangar?
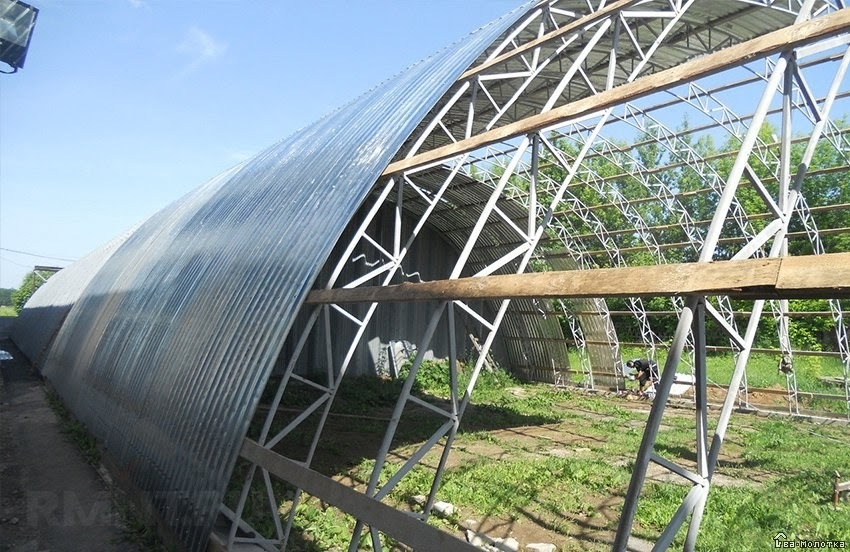
An arched hangar is a classic type building used for agricultural purposes such as cowshed, hay storage hangar, etc. as well as for production needs, storage systems, repair shops. It can be framed or frameless. The construction of hangars of this type allows you to create monolithic structures in a short time with the involvement of a small number of workers.

Comparison of an arched and straight-walled hangar (pros and cons)
Arched and straight-walled hangars differ in design, which affects their dimensional characteristics, installation and operating conditions. Let's take a look at the pros and cons of each type.
Rectangular hangar pros:
There is no size limit.
Placement of windows and doors in any part of the structure.
Uniform load distribution over the hangar area.
Savings on heating (no need to heat empty space).
Minuses:
Large frame weight.
Large construction costs.
Slow editing speed.
The arched hangar has a robust geometric shape that protects the frame from snow, wind and precipitation.
Among the advantages are:
Fast installation.
Low price.
Lightweight construction and large span overlap.
High seismic resistance.
Operation in almost any environment.
Minuses:
Do not make openings for windows.
There are dimensional restrictions.
When choosing the optimal design, it is worth considering the operating conditions of the room, the amount and time that you are willing to spend on installation. Arched hangars are a more economical option; installation can be carried out independently, thanks to lightweight structures and a simple sequence of actions.
Arched hangars prices
The price for the installation of an arched hangar consists of the following components: type and size of the structure; the cost of raw materials and their delivery to the construction site; use of special equipment; features of the place for the foundation; the number of people in the work team. You can order the service from a specialized company at a price of about 3500 rubles per 1 sq.m., or carry out the work yourself, significantly reducing the total cost.
Which hangar is better to build with your own hands?

Hangars differ in design. This affects the complexity of the work, the use of special equipment and the amount of final costs. The most preferable is the independent construction of an arched hangar, since:
construction technology is quite simple;
construction details are easy to transport and install;
hangar price is small, and quality materials are always available;
the area can be used in a variety of ways;
operating conditions are almost unlimited.
In addition, arched hangars can be insulated with sandwich panels. The frame structure is more stable than the frameless one, but it is not so easy to install.
How to install an arched hangar yourself (building an arched hangar with your own hands)
To carry out the installation of an arched hangar on your own, you need to understand the design issues, the types of necessary tools, and understand the work algorithm.
Hangar foundation
The first step is to decide on a place for mounting an arched hangar. The surface should be firm, not waterlogged, without noticeable differences in height, which will reduce the time for cleaning and leveling. The foundation can be tape, pile or slab. For the arched type, a pile or installation without a foundation is used.
Pile foundation device
This type of foundation can be used in conditions with relief changes and for frozen, watered soils. In the process of work, screw piles are being installed. The work is carried out in stages:
The plot is marked out with pegs placed under each pile, which are alternately connected with a construction cord. This makes it possible to check that the angles and diagonals are correct.
Depressions are made in the soil corresponding to the diameter and length of the piles.
The piles are prepared for screwing by making holes in the top of the pipe for convenience.
Screwing piles.
Control of the verticality of the installation by level.
Cutting piles to the desired height.
Treatment of their ground part with an anti-corrosion coating.
Pouring concrete into the space between the piles.
Tying with grillages.
At the first stages, it is worth monitoring the clarity of the position of the piles and the correctness of their location. The uniformity of concrete pouring and the stability of the final structure depend on this.
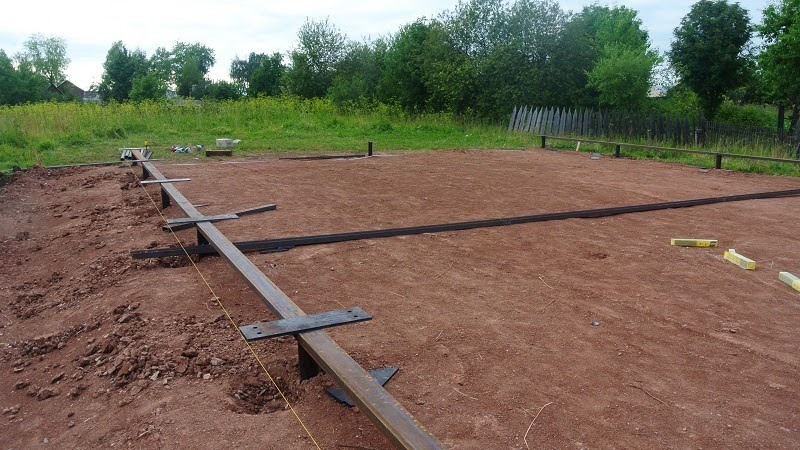
Hangar installation without foundation
The arched hangar can be installed without a foundation on a special metal frame. The process takes place according to the following algorithm: the soil layer is removed up to the clay layer; a flat area is being prepared; the pit is covered with rubble and leveled horizontally. After that, a metal frame is welded from an I-beam or pipe equal to the dimensions of the hangar with transverse bridges. Racks are welded to this frame. It is laid in a place prepared in advance and the installation of the case begins.
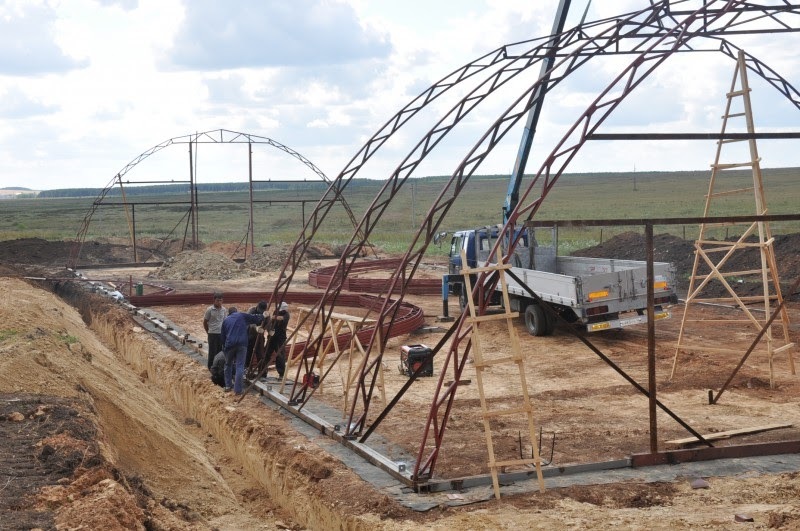
Self-assembly of the hangar frame
Installation of the hangar frame can be done independently without the use of special equipment. For this:
Corners are welded to the foundation in places where the support columns of the trusses are installed.
Holes are drilled in the corners and bases of the columns to securely fix the metal structure.
Separately, according to the prepared layout, the columns and trusses are welded or bolted (for collapsible hangars) into a single structure.
It is brought to the installation site, the base is fixed and lifted vertically.
The structure is checked by level and welded.
Columns and trusses are fastened with lintels, ties or lathing.
Thus, all the details of the hangar are sequentially fastened.
For hangars with a height of more than 3 meters, scaffolding is installed under the farm, where there is a worker pulling up the cable.
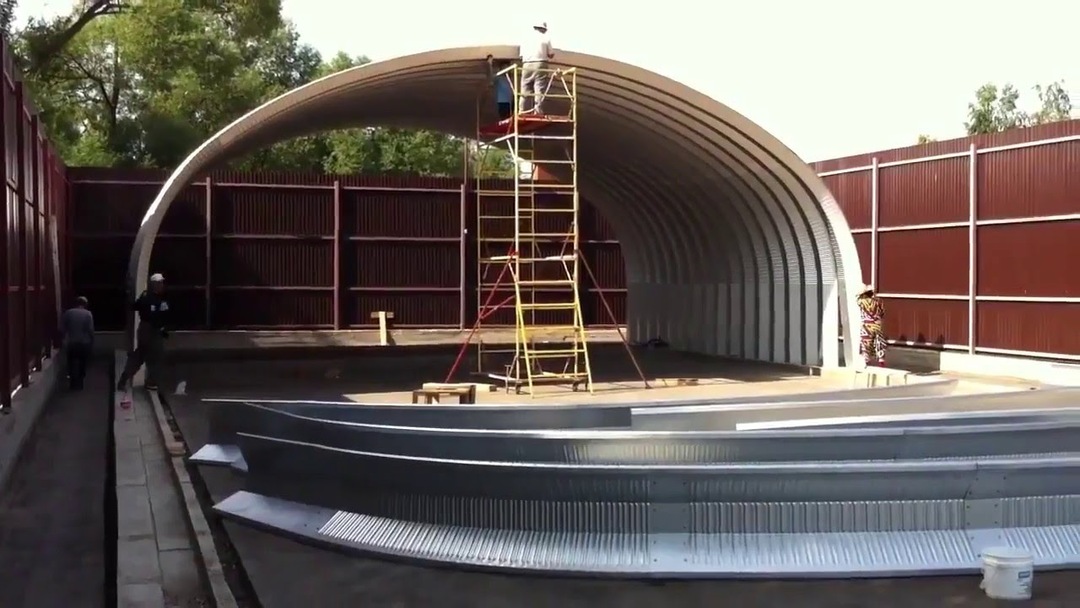
Hangar frame cladding
The frame cladding is carried out in several ways, depending on the selected operating conditions of the hangar. The simplest is considered to be cold sheathing with corrugated sheets. It is carried out from the bottom up. Each next sheet falls on the previous one with a slight overlap. They are fastened with self-tapping screws for metal, gradually moving towards the roof, where, upon completion, a ridge ebb is installed. This method does not allow the hangar to be insulated. For additional insulation, warm sheathing is used, which is carried out:
By sheet-by-sheet method: the walls and roof are sheathed with a superdiffusion membrane with a layer of spray, after which sheet-by-sheet sheathing with corrugated board is carried out.
With the help of sandwich panels, which are already structurally decorated with insulation.
It is worth deciding in advance on the functional purpose of the room. This affects the amount and type of purchased materials, the type of cladding and its technology.
Laying of communications
Engineering networks are laid at the design stage. This can be: electricity, ventilation, heating, plumbing, sewerage, etc. All work must comply with technical standards and operating conditions. At this stage, it is better to contact specialists if you do not have experience and knowledge of laying communications.
What tools and specials. equipment may be needed for the entire installation process of an arched hangar
Installation of an arched hangar is a relatively easy process in which you can do without special cranes.

The standard required set of equipment includes:
folding machine for bending the edges of metal profiles;
concrete mixer, if the foundation is piled;
stock of buckets, shovels and trowels, wheelbarrows;
building level;
electric arc welding machine - for the installation of end walls;
puncher, drill, set of wrenches;
Circular Saw;
hammers, sledgehammers, crowbars;
construction cables.
The list of equipment may increase if you decide to independently conduct communication networks, as well as additionally insulate the hangar. Delivery of materials to the construction site will require the hiring of trucks.
The minimum number of workers and the timing of the construction of an arched hangar
Seven to twelve people can assemble a small arched hangar in just one day. The three-day construction will require a team of five workers. The time of construction and the amount of labor depends on the established dimensions of the hangar, the need for insulation, and the characteristics of the area for installation.
Now you know how to build an arched hangar yourself. The installation process is not difficult if it is carried out in stages, but it requires sufficient experience and the availability of all the necessary tools.